Vui lòng liên hệ với chúng tôi– chúng tôi sẽ liên hệ lại với khách hàng bằng điện thoại hoặc email.
Lưu ý: Tham khảo ý kiến của nhân viên INO sẽ giúp bạn tiết kiệm được thời gian và chi phí khi cần mua sắm. Với sự tư vấn của chúng tôi, bạn sẽ không gặp khó khăn khi tìm hiểu về đặc tính của sản phẩm cần mua.
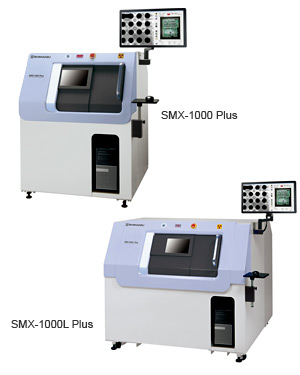
The SMX-1000 Plus and SMX-1000L Plus X-ray inspection systems are a further refinement of the conventional models(SMX-1000 / SMX-1000L), which have become the benchmarks of the industry.
The operability so well received in the conventional models has been further improved, resulting in simple and easy-to-see windows. Fluoroscopic images and exterior images have been increased in size, providing a new level of visibility.
The measurement functions are much easier to use. Measurement results can now be obtained with a mouse click, with no need for complicated parameter settings.
New functions such as enhanced region-of-interest display have been incorporated, complementing a wealth of conventional functions including navigation via exterior images, step feed, teaching, and image browsing.
Application
Both the SMX-1000 Plus and SMX-1000L Plus provide high-magnification nondestructive fluoroscopic examinations of junction conditions (disconnect, contact) of ultra-micro parts on high-density PCBs, BGAs, CSPs, or system LSIs.
Features
Further Improved Operability

To ensure that the intended operation is performed with no guesswork, windows have been increased in size and completely remodeled with a simple and easy-to-understand layout
Clear Images

As with the conventional models, combining a flat panel detector with Shimadzu image processing technology leads to clear, distortion-free images.
Inclined Fluoroscopy

Performing fluoroscopy at an angle can help detect defects that are undetectable with vertical fluoroscopy.
Easy Measurements

Conventionally troublesome measurement parameter settings are automatically optimized thanks to our proprietary image processing technology, so measurement results are obtained with a mouse click.
Superior operability
Inspection condition preset functions
Simply select a setting from the inspection condition list to immediately view the most suitable image of a part (material) without changing X-ray conditions, thanks to each image's wide dynamic range.
Positioning via exterior-view CCD
The stage can be positioned using an image from a CCD camera that can view the entire stage. This allows the stage to be immediately moved to the desired location.
Positioning on the live image (mouse operation only)
Since all instrument operations can be performed using a PC mouse, operators can concentrate on the inspection using just the monitor screen. A useful “center shift” function moves the location clicked by the mouse to the center of the monitor screen.
A wide range of functions provide operator support
Step feed function
This function moves the stage in even increments and improves the efficiency of inspections of samples with identical shapes, such as items placed on pallets.
Teaching function
This function moves the stage to a pre-registered inspection point. Registering an inspection point allows the stage to be moved quickly and improves inspection efficiency when repeatedly inspecting the same type of samples.
Image list
Displays images saved in a folder as thumbnails. As described below, this thumbnail display has a variety of functions to assist operators.
A variety of measurement functions are provided
Dimension measurements
Distances between two points, angles, and curvatures can be measured. Previously, size calibration was required for each image, however, this instrument calibration data is calculated internally together with fluoroscopy magnification for more efficient measurement.
BGA void rate measurement
When measurement is started after setting a threshold, measurement results of all surface protrusions are displayed. Acceptance judgment is automatically performed based on preset acceptance criteria and measurement results can be saved in CSV format files.
Area ratio measurement
The area ratio of an object in a specified ROI (region of interest) such as for die bond or solder wettability can be measured as the object area/ROI area value.
Wire sweep measurement
Wire sweep can be measured simply by clicking both ends of a wire and the maximum curve point and measurement results can be saved in CSV format files.
Optional Equipment
Rotation/Inclination Unit

Attaching the removable rotate and tilt unit allows X-ray fluoroscopy of small parts from a variety of angles, helping to reduce chances of oversights.
Lưu ý: Nếu một thiết bị nào đó không được liệt kê ở đây, điều đó không có nghĩa rằng chúng tôi không hỗ trợ được bạn về thiết bị đó. Hãy liên hệ với chúng tôi để biết danh sách đầy đủ về thiết bị mà chúng tôi có thể hỗ trợ và cung cấp.
INO: Bán, Báo giá, tư vấn mua sắm và cung cấp, tư vấn sản phẩm thay thế; tương đương, hướng dẫn sử dụng, giá…VNĐ, …USD info@ino.com.vn | INO Sales: 028 73000184 | Shimadzu-Microfocus X-Ray Fluoroscopy System (Model:SMX-1000 Plus/SMX-1000L Plus ).


